

This character has had all his geometry combined into a single mesh, and everything has been bound to a single skeletal hierarchy. He uses a very basic FK and IK set up (FK controls for the arms and IK handles and controls for the legs). Before we set up our export settings using the NeoAxis exporter (a tutorial is given on how to install the exporter, and can be found here http://www.neoaxisgroup.com/wiki/Documentation/Tutorials/Export_models_from_Autodesk_Maya ), we need to do some prep work.
A quick select should be made of all the bound joints inside the hierarchy (any bone that has geometry bound to it). To do this, select each bound joint individually, not just the root, and create your quick select set by going to Create > Sets > Quick Select Set... and name it however you please (the rigger should have done this to make the animator's life easier). For the purposes of this tutorial, assume all animations have been finished and you are ready to export. Select all the joints using your quick select set and go to Edit > Keys > Bake Simulation. Have your settings match the image below: For time range, use whatever you need for your scene.

Apply the bake, and then go to Modify > Evaluate Nodes > Ignore All Checked. We need to turn off all influencing constraints and IK's because the exporter for NeoAxis does not accept joints that are being influenced by anything, so we bake our animations to save them on the joints.
Open the NeoAxis exporter, and go to Settings. Click the add button (the green plus sign). In the next window, you will have to find the object shape, which can be found by clicking your geometry and going to the Attribute Editor inside of Maya. There you will find the shape node:


Select the appropriate node, and say OK. You will be brought back to the first window, with your character added. Make ExportSkeleton to be True. Click the Animations line and then the ... icon next to it:
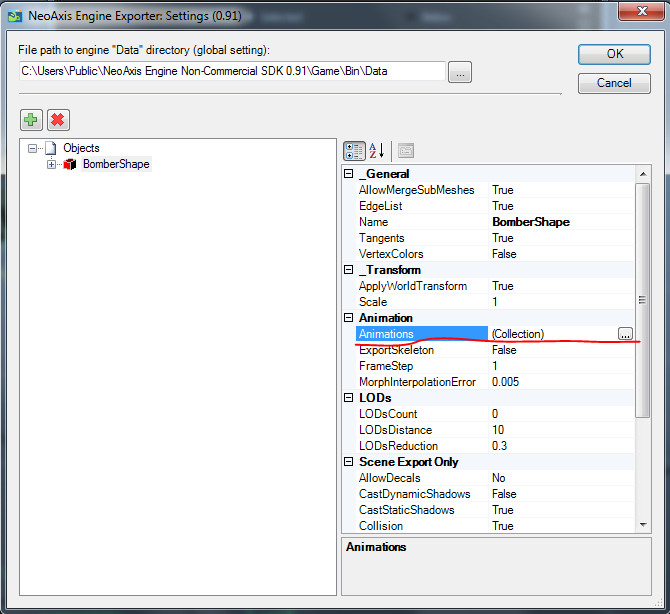
 In the Collection Editor, you can add all your animations to export. Name them appropriately and be sure they are using the Skeleton Format. Input the beginning and end frame for your animations. Here I have added the walk cycle for the Bomber which starts at frame 26 and ends at frame 49. Click OK and be sure to put the correct file path at the top as well and then click OK again. You will be taken back to Maya where you will select your geometry and then go to the NeoAxis Engine tab > Export, and in the new window, click Export!
Your model has been exported and is ready to be used in NeoAxis!

No comments:
Post a Comment